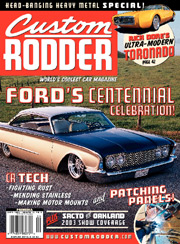
Custom Rodder Magazine Endorsement
Article Information:
Article Name: High-Caliber Rust Inhibitor
Author: Jason Walker, Associate Editor
Publication: Custom Rodder Magazine
Application: Spray
September, 2003
Article Description:

There Are No Two Ways About It, Rust Needs to Die!
Successfully dealing with a rusty car can be as exasperating as troubleshooting electrical problems. Once you start, it’s like opening the proverbial can of worms. Rust travels under paint, rubber, carpet, and just about anywhere else you might not look until it’s too late. Normally this would mean spending many hours grinding, cutting, and forming patch panels to replace the cancerous metal that needs to be cut out. So what about a rusty chassis or any other part that simply has been affected on the surface? You wouldn’t want to cut out a section of rusty windshield frame, only to have to build a whole new channel section to fit in its place, unless you are extremely competent with bodywork or the rust has completely deteriorated the metal.
Sometimes the best way to deal with small areas of surface rust is to simply grind through the top layer until you see clean, shiny metal. The problem with grinding the rust off is knowing how deep the rust has traveled and when to stop grinding. Simply put, if the affected area is too far gone, there really isn’t anything you can do but cut it out and replace it with new steel. But, if the affected area is suffering from surface rust only, you will want to read on.
When someone says, “Hey, check out this new rust treatment; you just apply it to the rust and it becomes neutralized,” most of us think of some late-night infomercial gimmick. Truth be told, when we first heard about Rust Bullet we had those same feelings. Being a body and paint man, yours truly was extremely skeptical before trying this stuff out. The first thing we did was read the literature Rust Bullet sent to us. The entire brochure was dedicated not to how “cool” Rust Bullet is, but rather an in-depth look at how this product was tested against all 319 other brands of rust control products.
Every test from seawater immersion to impact resistance was performed at independent laboratories following the standards of the American Society for Testing and Materials. As far as we are concerned, any company that believes in their own product enough to put it through eight types of rigorous tests at six different laboratories, including the National Testing Standards Inc., Atlas Weathering Group, and B.F. Goodrich Aerospace, earns some consideration.
So now, the real question is what kind of preparations need to be performed for maximum benefit? After all, a chemical this complex must be equally complex to apply, right? Wrong! Rust Bullet can be applied by brush, roller, or out of a normal automotive paint spray gun. Surface prep consists of simply scraping away or wire wheeling any large flakes of rust from the surface. The directions add to this: if scraping or wire wheeling cannot be done, a heavier first coat will overcome this problem, and then soak through the flakes to penetrate the steel.
After two to three hours of drying time for the first coat, the second and final coat can be applied. Rust Bullet needs no reducer or catalyst, and the equipment can be cleaned with mineral spirits, toluene, xylene, or MEK. One of the only stipulations with using this product is that it cannot be applied when the air or surface temperatures fall below 35° F. For our testing, we prepped and sprayed the front framerails of a ’67 Chevelle wagon. We figured since we went to all the work of making the new engine look pretty, there just was no reason not to give the rest of the engine compartment the same attention.
Besides, this type of work is probably much closer to what us “backyard” types can and would do to our own rides as well. Sure we would have liked to pull the body from the chassis and send it off to a media blaster/powdercoater, but for our purpose, that is just not feasible or necessary. Once the first coat is applied, you might want to spray the entire car with it. The silver metallic flowed out of the gun so nicely, we weren’t sure if it was the right stuff. Don’t be afraid to really lay down a heavy coat on the first round. Pound on as much as you can without it dripping off. You must wait at least two hours before applying the second and final coat. This is important to allow the necessary chemical reaction to occur that permanently bonds the Rust Bullet to the steel. This is also a good time to catch the spots you may have missed the first time around.
Although Rust Bullet dries to a beautiful and tough-looking finish, sort of like that old HammerTone paint, it can be topcoated with whatever you want spray over it. We recommend, as does Rust Bullet, to let the Rust Bullet do its thing for at least a day or two before applying your topcoat of color. The detail shot clearly shows a nice smooth, even surface with no signs of pits, flakes, or chunks, even though just before we sprayed the black, we tried to scratch and chip this section.
The label on the can basically explains everything you want out of a product like this. Now lets see how it works… A little elbow grease with a wire brush or wheel easily takes care of removing the semi-loose flakes of rust. While this is an important part of the job, keep in mind that if you can’t get to some of the harder-to-reach areas, Rust Bullet will–if used properly–soak through the flaky rust to penetrate into the steel. This is why Rust Bullet was the only product to pass the impact resistance test. Carefully mask any parts and pieces you don’t want coated.
Notice we used the aluminum foil tip from Street Rodder magazine’s article, “Pro Painter’s Tips” by Ron Ceridono (Mar. ’03). Lets just say this tip works so good, someone should package foil to sell in automotive paint supply stores. The foil wraps around any shape and stays without tape. No matter how you choose to apply it, just pour and go. Don’t forget a strainer if you are using a spray gun. Also make sure to fully stir the chunks that settle to the bottom of the can. This is normal as with any other high-solids type of paint or primer. The trick is to stir without folding too much air into the mix. Stir like it’s your first cup of mud in the morning. While your spray gun/brush/roller is in service, you may as well cover any other parts and pieces in similar shape. Take care to prep these pieces in the same manner before spraying.
-
facebook
-
YouTube


Outside of US: 1-775-829-5606
Toll Free: 1-800-245-1600
Canada Toll Free: 1-800-789-3993
Email: Support@RustBullet.com
Monday-Friday 8:30am to 5:00pm PST
300 Brinkby Ave., Suite 200
Reno, NV 89509
USA

